

Low Brass Class Teaching Guide
by Richard Murrow
I. Introduction
II. How Do We Begin
III. The Mouthpiece
IV. Holding the Instrument
V. First Sounds on the Instrument
VI. The Tongue
Some Thoughts on the Importance of Responsible Teaching
Breathing Devices
Recommended Texts
I. INTRODUCTION
The following guide is intended for combined instrument low brass classes. Hopefully this can function as a teacher’s method of structuring the development of students from a beginning to intermediate performance level. From my experience, one of the most common problems that most teachers make in the development of beginning low brass students (trombone, euphonium, and tuba) is an organized practical approach that will allow students to develop SLOWLY and naturally. Low brass instruments cannot and should not progress at the same rate as woodwinds, percussion, or even trumpet. One of the primary reasons for this is because of the sheer physical effort involved in playing these instruments. Trombone and tuba, in particular, have very specific problems that will be discussed later in detail. Obviously, in the case of the trombone, there is the problem of the slide and the physical strain of holding the instrument, especially where young students are involved. The tuba has the physical problems of size, weight, air, and manufacturing inconsistencies in leadpipe heights, just for starters. Euphonium is the most user friendly of the low brass instruments in the early stages of playing, but as soon as students begin to grow, problems arise with posture and proper holding of the instrument. These faults can create serious problems with tension, tone production, breathing, range, etc. by the second or third year of playing.
If there is a golden rule that can be applied to teaching low brass it is, “Patience and a slow methodical musical approach is the key to healthy, happy low brass students”. What is the single most important physical aspect to the successful playing of low brass instruments? I think most, if not all serious low brass players would agree that it is AIR or WIND. This is the first concept that must be introduced to eager young students. It must be approached in a way that will unmistakably establish the idea that these are wind instruments and WIND is the fuel that makes them work. In recent years there have been numerous books and videos published as well as many breathing devices that are devoted to breathing exercises and the respiratory system. It is highly recommended that every teacher investigate these and become familiar with their use and individual functions. This however, must be coupled with a strong emphasis on tonal and musical concepts from the very beginning of instruction.
II. HOW DO WE BEGIN
-
Posture
Posture is the first step to all things that follow in this guide and in successful performance for your students. Without erect, relaxed posture the low brass player will not reach his ultimate potential. What is the key to good posture? We want to achieve posture that will allow the torso to be in a tall, relaxed position. To achieve this sit tall with a slight inward arch in the lower back. Keep the shoulders relaxed and allow the chest to be in an upward position. The head and jaw should be straight, aligned with the spine and looking forward. Do not let the head tilt downward as this will close off the throat. Keeping the head up is also crucial for good playing position or instrument carriage.
-
Breathing
Once we have established good posture we can begin our instruction on breathing. Obviously, breathing is the most natural, basic aspect of life and hopefully we can keep that natural approach as we learn how to apply those basic instincts to low brass performance. One of the things that I would like to avoid discussing is the term diaphragm. I feel to many methods spend time discussing this and the diaphragm is primarily an involuntary muscle that we do not need to consider and a muscle that will work properly if we simply learn to inhale in a natural manner. How do we get started with a simple explanation that will have students fill with air and not get too analytical or involved with the breathing process? Do the natural thing. The breath should feel like a YAWN. Low brass instruments need large quantities of wind/air because of their high flow rate and lack of wind resistance. What we need to master is a breath with no resistance or restriction. This means that the air passages MUST be open! To imitate a yawn try the following: Think of tall syllables like “O” or the word “OH”. You want to avoid high pitched or hissing sounds as you breath. Pretend you are saying the word HOME backwards. These words or syllables should create a relaxed feeling during inhalation.
Next start with simple breathing exercises. Set a metronome at mm. 60. Have the students inhale for four beats and then exhale for four beats. Do this exercise for 8-10 continuous repetitions. It is important that the air never stops. The student is ALWAYS inhaling or exhaling. We never want the air to stop when we are performing. Consequently, never let it stop during these exercises. Next, do a three count inhalation and a five count exhalation, 8-10 repetitions. If students get dizzy let them stop momentarily and then resume the exercise. Follow this with a two-count inhalation and six count exhalation, then a one-count inhalation and seven count exhalation. The idea is that we are trying to develop the relaxation that is needed to take a quick breath in a performance situation. Do not forget to use the “O” syllable through out these exercises. Additionally, in a real playing situation if we spend two or more counts taking a breath we can create tension problems where we build pressure in the body, which can lead to serious physical problems.
There are many commercially available breathing devices on the market that will also greatly help with breathing efficiency. These will be listed later and ALL should be investigated and understood by the concienous teacher. Breathing devices are extremely helpful to students and professionals alike and are highly encouraged.
-
Embouchure
This is an aspect of wind playing that gets an enormous amount of attention and I think possibly misdirected, misunderstood, and misinformed attention.
I have heard many complex definitions for what an embouchure is, what it does and how it is supposed to contribute to the wind playing. I do not want to give the impression that the embouchure is not important, because it is, but I feel that many times so much attention is directed at the embouchure that we fail to concentrate on more vital aspects of playing. We do need to understand a few basic things about how the embouchure functions, but we also need to understand that too much conscious concern about the embouchure can paralyze the brass player. So, lets use the K.I.S.S. (keep it simple stupid) approach to embouchure. Remember that having and teaching a strong concept of tone and the use of wind will help the embouchure function properly.
So, how do we keep it simple for young and old students alike? EVERYTHING we teach should be approached in the most natural manner possible. Let’s get back to deciding what an embouchure is. “It is a mouth with firm corners and a firm chin”, nothing more. The corners and chin should be firm enough to control the note that is being played. As you blow faster air to ascend the embouchure will naturally firm up and the opposite occurs as you think of being more open and blow a thicker column of air for the low register. Additionally, the embouchure will also respond to the pitch commands that are given to it by the brain and naturally adjust to the correct pitch if we do not try to control it. Keep it natural and always encourage the student to mentally sing the correct pitch in their mind! Hear it before you play it!
How do we form an embouchure?
This is really simple. Remember, “the embouchure is a mouth with firm corners and a firm chin”. To teach this hold your hand 8-10 inches in front of your mouth and blow a fast, concentrated stream of air at the center of your palm. You should feel a firm chin and corners. Your chin is firmly pulled down and the mouth corners are firm and hugging against the teeth. This is your embouchure. It will not look exactly the same for everyone, but the important thing is that the chin and corners are firm. It is not necessary that we are able to name all of the muscles in the face or that we know the function of each muscle. It is only necessary that we have firm, not tight, corners and chin.
III. THE MOUTHPIECE
-
Mouthpiece Placement
A general rule that works for mouthpiece placement on all low brass instruments is two-thirds upper lip and one-third lower lip. It is important to try to have the mouthpiece centered between the corners. The two-thirds/one-third placement might not always work with tuba mouthpiece placement especially for younger students, as the upper lip might be two short to actually get the mouthpiece in a two-third/one-third position. In this case we should try to at least do a 50/50 placement. Another important aspect of mouthpiece placement is the distribution of upper/lower lip pressure. This is why, for most students, the mouthpiece will be at a slight downward angle. Generally, most people have a slight over bite where the upper teeth extend slightly over the lower teeth creating the downward mouthpiece angle. This also will vary depending on the degree of over bite.
-
Making the First Sounds On The Mouthpiece Alone
It is obvious for anyone who has a background in wind instruments that we must buzz or vibrate our lips to produce a sound on a brass instrument. This is achieved by blowing WIND “through” the lips. One thing that I feel is very important is to down play the idea of buzzing. What! But we MUST buzz the lips! Yes we do, but let’s approach this from a different point of view. While I understand that virtually everyone who has started on a brass instrument has been told to buzz from the beginning and this approach certainly has produced marvelous results, I feel that this can cause tension in some students. So here is my approach: Let’s go back and review our lesson on forming an embouchure. Now, set the mouthpiece in position and pretend you are blowing as you did when forming the embouchure. Do not forget to think of the “O” syllable as you breathe, fill with air. Do exactly the same thing again, but this time as you blow gently and slowly bring your lips together until a VIBRATION begins. Do not tell the students to BUZZ. Just have them slowly bring their lips together until the vibration starts. Do not suggest a specific pitch. The important thing is to keep a feeling of relaxation and continue to encourage those firm corners and chin. This approach will help achieve a very relaxed sound and it encourages the correct amount of firmness in the embouchure.
IV. HOLDING THE INSTRUMENT
Up to this point the students (theoretically) have not had their instruments out of the case or in their hands. We should cover each instrument separately. However, before we do that let’s discuss some very basic, “How Not to Destroy the Instrument Rules”.
- Make sure that the case is right side up before unlatching it! I know this sounds silly, but believe me it happens. With trombone cases the bell side of the case will usually be on the players left side.
- With euphonium and tuba, make sure that students NEVER lift or carry the horn by small tubing or the leadpipe. ALWAYS hold and lift large instruments by the large tubing.
- Make sure that trombone slides are always locked when you are not playing the instrument. Get students in the habit of locking the slide before putting it in the case. “A stitch in time saves nine”!
- Always make sure that the instrument is secured properly in the case, using the inside latches or straps. This eliminates an expensive instrument from falling out when the case is opened. This is important for all instruments, but particularly when it comes to instruments that are expensive and are purchased as a part of your band budget.
- Encourage trombone students to use a trombone stand when the instrument is not in the case. Yes, it is an additional expense, but well worth it. The seat of a chair or the floor is not an option
- NEVER stand a tuba or euphonium on the bell unless you own it. Place the tuba/euphonium on the floor with the valves and valve sides facing up away from the floor. Standing these instruments on the bell causes the bell to become weakened and become creased or crushed. It also makes them very vulnerable to falling over, causing even greater damage.
Trombone:
The trombone should be assembled so that the slide and bell section are at a 90 degree angle. The left hand index finger should sit above the mouthpiece receiver, the thumb is placed behind the large brace on the bell, and the other three fingers fit between the two braces on the hand slide. The hand is then in the shape of an L as you hold the horn with the left hand. The left hand, wrist and forearm should remain straight and not bent at the wrist to avoid tension and fatigue. There are two different methods of holding the hand slide. One is to turn the palm of the right hand inward as if you are looking at it and then hold the bottom side of the hand slide brace between the thumb and the index and middle fingers. You are then looking at your palm and right hand thumb nail. The second method, the one that I prefer and recommend, is similar but the palm of the hand is facing down towards the floor instead of facing the player. You are still looking at your thumb nail, but only the index finger and thumb are holding the slide. It should look like you are making an “OK” sign. The reason I prefer this method of holding the slide is because the forearm is more relaxed than it is when the palm is facing the player. For more information on this it is suggested that you study the excellent book, “Trombone Technique” by Denis Wick.
Euphonium:
The explanation given here is for a top action, right facing bell euphonium since this is the most commonly used instrument by students and schools today.. First, make sure that the player is sitting erect. Good tall posture with relaxed shoulders and a slight inward arch in the back. The left arm should reach around the front of the euphonium and hold the third valve slide at roughly a mid point on the slide. The euphonium should be resting on the left leg. With the right hand make a “C” between the index finger and thumb or imagine you are holding a glass of water. Bring this into the valve section with the thumb resting behind the first valve and your fingers sitting above the valves with a slight curve to the fingers so that only the first joint of each finger is sitting above the valve buttons. IMPORTANT: If the euphonium mouthpiece is too low when the player is sitting tall and holding the instrument as described, then a small cushion or rolled up towel should be placed between the players left leg and the euphonium so that the correct height is achieved. Do not let the player bend down. Adjust the instrument to the player! Do not adjust the player to the instrument!
Tuba:
The information given is for a left facing bell, front action valve tuba.. For right facing top action valve tubas refer to the information on euphonium.
There are almost as many ways to hold cumbersome tubas as there are makes, styles, and sizes of tubas. The important thing to remember is to make sure, as stated with regard to the euphonium, to “adjust the instrument to the player, do not adjust the player to the instrument”. First, the player should sit towards the edge of the chair with his feet flat on the floor. Sit tall and relaxed with a slight inward arch in the back. Bring the tuba up so that it is either sitting on the players lap or on the seat of the chair. If the instrument and the tubist are compatible the tuba should be positioned so that the mouthpiece comes directly to the player’s embouchure without any unnatural adjustments of the head. The left hand will hold the left side large tubing at approximately a mid point on the tuba. The right hand simply reaches around to the front of the tuba resting on the valve buttons in the most relaxed manner possible. If correct posture cannot be maintained then a tuba rest should be used.
The tuba rest is a very important tool that can help ALL tuba players. This is a small tripod type tuba stand that will allow tuba players to adjust the instrument to a comfortable height without any unnecessary weight or stress placed on the lap or back. If young students are comfortable and do not feel as if they are fighting the tuba they enjoy playing more and are less likely to continue playing!
V. MAKING THE FIRST SOUNDS ON THE INSTRUMENT
-
Sustained Tones
Now, with the instrument, repeat ALL of the steps for making the first sounds on the mouthpiece. The measure of success here is getting vibration and making a sound, not a specific note. Once the student is consistently able to begin a sound using this process you can begin to center in on a specific pitch. Usually finding a 3rd partial F is a simple note for most students. Remember though that students might not get this pitch immediately. As with buzzing, do not make students feel like they are wrong if the first note they play is not the “F”. It may take a little time to settle in on this pitch. The 3rd partial F is also the first note in most beginning methods.
-
Ascending and Descending Slurs
After students are beginning to settle in on a specific pitch and are able to sustain a long tone, it is good to introduce the concept of keeping air/wind moving between two different pitches. To change notes simply have students slide the pitch DOWN from the original sound. Obviously, we are introducing a descending slur, to achieve this the student should relax the oral cavity as in pronouncing eh-ah. After the descending slur is firmly established the next step would be to slide the pitch up or perform an ascending slur. Important: Explain that in order to execute the ascending slur they should simply blow the air faster and if necessary slightly arch the tongue as in pronouncing the syllables ah-eh. All slurs should be done very slowly (whole notes at quarter = 72-80) at first. As previously mentioned, be sure the students are getting the concept of moving air from one note to the next in a continuous, uninterrupted manner.
Notice that we have not discussed the use of the tongue yet. Get a concept of starting the sound and the function of the wind and embouchure first. The tongue will be easy to add. Whether you tongue or slur it is always important to have the concept of blowing air/wind through the lips. This will always be a foundation for good playing/performance concepts.
VI. THE TONGUE
As with all other aspects of instrumental performance, it is my belief that tonguing should be approached and taught in the most natural manner possible. Consequently, I do not want to specify a particular place in the mouth where the tongue should be placed when starting a note. This will certainly vary depending on the size and shape of the mouth and the length of the tongue. We are all different, so let us discuss what I believe to be a more natural approach: Simply have your students pronounce words like, “Don, dawn, dumb, etc.”. The place where the tip of the tongue touches the mouth in pronouncing these words is the proper placement for each individuals tongue. To begin a sound using the tongue, breath as you did when starting without the tongue and simply move the tongue as you would to pronounce “Dah”. Words beginning with “D” work well for legato articulations, while words beginning with “T” (Tom, Ted, etc.) work for a firmer articulation. If you can say these words, you can tongue.
I like to start students out using a legato tongue. This encourages students to continue the concept of blowing air through notes as they change. The legato tongue is also an excellent device to allow a teacher to tell with certainty if the student is tonguing. All young students tend to get a rather undefined, “mushy” articulation, which is sometimes difficult to distinguish from a breath attack, but if they are connecting all notes at first in a legato manner they will have to tongue. With the breath attack you will be able to hear a slight separation between notes. Breath attacks MUST be avoided. This is a difficult habit to correct if not detected early on. I have seen students who played for 7-8 years with this problem. At that point it becomes almost impossible to correct. Another aspect of the legato tongue is that it is more relaxed and will allow for development of a very fast tongue. When the students begin tonguing have them tongue repeated quarter notes on the same pitch. This will show very quickly who is and isn’t tonguing. Once a student has developed a good legato tongue it is a very simple matter of changing the syllable to “T” to achieve a more pointed articulation. I would not introduce this for several weeks or longer though.
Some Thoughts on the Importance of Responsible Teaching
From the information given in this discussion it is apparent that there are only two ways to change notes on a wind instrument, TONGUE or SLUR! If this is true, then we have covered the most basic fundamentals of good wind playing. Why then do so many players continually have problems? Is it because they try to make playing too complicated? Yes, in some cases. Is it because they refuse to work on the fundamentals of playing, tonguing, slurring, and technique on a daily basis? Yes, in some cases. Is it because they were never taught the correct information from the beginning from well informed, dedicated teachers. Yes, in many cases. Many well intentioned teachers want to get to the concert or contest pieces and neglect the fundamentals. You can never neglect the fundamentals as a teacher or as a player. NEVER! Always be a responsible teacher! You may have the next Wynton Marsalis in your beginning brass class. Treat each student as if they are going to be the greatest player their instrument has ever known and one of them might be. It is up to you to give your students all the well thought out information you can find. This is your responsibility. No one else is teaching YOUR students. Demand all that they are capable of and give them all you are capable of! Do not ask them for 100% if you can’t give 100%!
Breathing Devices
There are many commercially available breathing devices that can do much to help develop the respiratory system and the psychology of breathing. I will not go into a detailed discussion of each device, but will simply list the most common ones so that you can experiment with these yourself. Make sure that as you use these that you do not allow yourself to work so hard that you create tension. This would defeat the purpose of the device. Here is a partial list of the most widely used breathing devices:
Breath Builder
Air Bag or Anesthesia Bag
Inspiron/Incentive Spirometer
Voldyne
Power Lung
An excellent book to learn more about breathing and the psychology of performance is, “Arnold Jacobs: Wind and Song” by Brian Frederiksen.
Recommended Texts
I strongly believe that our learning never ends. If we are really serious about the art of teaching we should never stop trying to learn. Clinics, lectures, observation, and the accumulation of a personal library are mandatory to attaining teaching excellence. To that end I have listed SOME of the important books that I have found helpful as a teacher.
Kenny Werner, Effortless Mastery*****
Brian Frederiksen, Arnold Jacobs: Song and Wind, Wind Song Press
Denis Wick, Trombone Technique, Oxford
Also Sprach Arnold Jacobs, Compiled by Bruce Nelson, Polymnia Press
M. Dee Stewart, Philip Farkas – The Legacy of a Master, Instrumentalist
Philip Farkas, The Art of French Horn Playing, Summy-Bichard Music
Philip Farkas, The Art of Musicianship, Musical Publications
Edward Kleinhammer, The Art of Trombone Playing, Summy-Bichard Music
Gunther Schuller, Horn Technique, Oxford
Delbert A. Dale, Trumpet Technique, Oxford
Donald C. Little, Practical Hints of Playing the Tuba, Belwin
Heinz Fadle, Looking for the Natural Way, Edition Piccolo
John R. Griffiths, The Low Brass Guide, Jerona Music Publications
Norman J. Hunt Guide to Teaching Brass, WM. C. Brown Publishers
Malte Burba, Brass Master Class, Schott
Janes H. Winter, The Brass Instruments, Allyn Bacon
(texts continued)
Herbert C. Mueller, Learning to Teach Through Playing, Addison Wesley Pub.
Winslow & Green, Playing and Teaching Brass Instruments, Prentice-Hall
Michael Jordan, I Can’t Accept Not Trying, HarperSanFrancisco
Tim Lautzenheiser, The Joy of Inspired Teaching, GIA Publications Inc.
Tim Lautzenheiser, The Art of Successful Teaching, GIA Publications Inc.
Barry Green/Timothy Gallwey, The Inner Game of Music, Anchor Press Doubleday
The Instrumentalist Brass Anthology, Instrumentalist
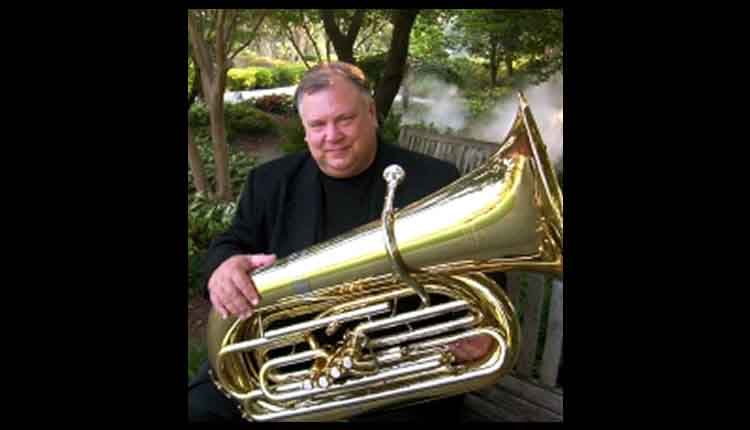
Richard Murrow is currently the principal tubist with the East Texas Symphony Orchestra, Texas Chamber Orchestra, Dallas Jazz Orchestra, American Chamber Brass, is co-leader of the jazz group, “Brazzology”. He has also played and recorded with both the Dallas Wind Symphony and the Dallas Jazz Orchestra. Read More Here
Miraphone (Artist, Clinician, Design Consultant)
Texas Christian University (Professor of Tuba/Euphonium)