

Developing a Beautiful Brass Sound
by Joe Neisler (Illinois State University)
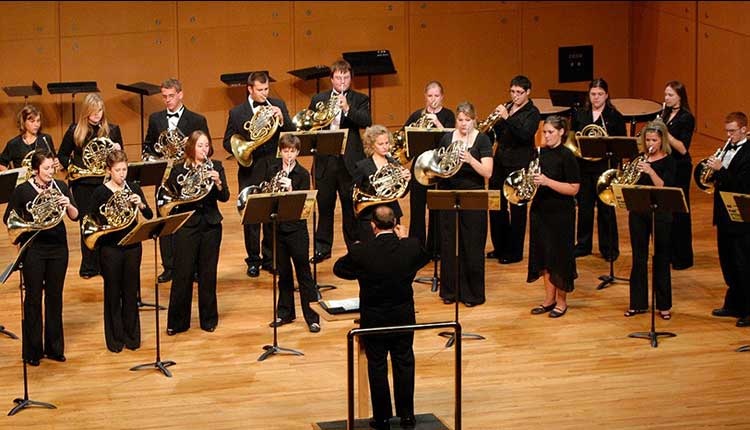
This discussion was developed for horn students, but works well for all brass. Sound is the first thing we notice and the last thing we remember about any performance. Tone is the most important aspect of our playing. Every note we play demonstrates our sound, good or bad. Our sound is a critical aspect of our musical personality and fingerprint. The following ideas will help develop a beautiful brass sound.
TONE CONCEPT
We must have a very definite concept of a beautiful tone in order to produce a great sound. Conception of tone is a mental memory, aural visualization, imagination or recollection of what a beautiful tone sounds like. We cannot imagine or remember what we have not heard and memorized so we must frequently listen to fine players live and on recordings. Daily listening to recordings of fine players will develop our concept of tone. iTunes, YouTube, television and movie sound tracks, orchestra and military band recordings make it easier than ever to find wonderful recordings of great artists. Playing along with recordings on the mouthpiece, a mouthpiece rim/visualizer or a muted instrument helps imprint the aural role model and imitation in our minds.
We should listen, imitate and compare our sounds to the great artists of our instrument. Horn players should listen to recordings by Barry Tuckwell, Hermann Baumann, Dennis Brain, Dale Clevenger, Eric Ruske and many other great artists. Daily listening is not enough. We must remember the sound of a beautiful tone and strive to imitate or recreate that sound whenever we play, on every single note.
Our ideal tone begins in our mind with imagination and recall. As we play, we communicate the ideals of sound and style through the instrument in our hands. To learn phrasing, style and artistry, listen to concerts and recordings of great singers, string players and pianists, not just brass players. To play with a beautiful sound, imagine a lovely sound in your mind and imitate. While you play, mentally hear a great artist playing the music on your stand. Horn players should also read the chapter on Tone Quality in The Art of French Horn Playing by Philip Farkas.
BREATHING
Inhale equal 3rds of air until you are full of air. Evaluate how you feel after inhaling each 3rd of your Vital Capacity. A large, full inhalation, which reaches your upper 3rd of capacity, may feel unnatural and very full. It is and that’s ok. Inhaling to the top 1/3 of air capacity allows us to play with optimum efficiency and success. The less air you inhale, the more your body will substitute unnecessary and inefficient muscle tension for airflow. This is the cause of most physical playing problems. Without enough air (fuel), many players contract or tighten their solar plexus or abdominal muscles, which automatically constricts the throat and airflow. Always inhale enough air to inflate to the upper 3rd of your vital capacity of air. With that much air you can relax your body and natural deflate instead of tightening abdominal muscles, which restrict the throat and limit airflow.
As you inhale a large amount of air, relax your body and allow your body to move as a result of inhalation and inflation. Don’t move to breathe, breathe and let your body move. Dale Clevenger, former solo horn of the Chicago Symphony writes, “under the stress of a lesson, rehearsal, audition or concert, all brass players occasionally forget to inhale enough air for optimum relaxation, efficiency and sound.” Keep breathing instructions simple; “blow from the mouth like emptying the water key.”
At http://www.jayfriedman.net/articles/long_tones, Jay Friedman principal trombone of the Chicago Symphony Orchestra, states, Think of a large beach ball filled to maximum capacity. If the plug is removed the air escapes in a sudden rush because of the pressure inside and the elasticity of the ball. The ball is made of a material that will easily expand when filled. It is not necessary for the outside of the ball to be contracted by squeezing it. The elasticity and the pressure inside is more than enough to expel the air in a steady, even manner. That’s the same idea a brass player needs to produce a long tone. The lungs are filled to capacity, the embouchure seals at the moment of exit, the tongue recedes and the pressure behind the embouchure propels the air forward passed the lips, causing them to vibrate as it passes. No other action is required from the rest of the body.
Just as the ball needed no squeeze from the outside to release the air, the embouchure needs no push from the torso to release the air. In a sense the torso becomes the concert hall: if the [abdominal and] diaphragm muscles are engaged and tight, the concert hall will sound small and dead. If the [abdominal and] diaphragm muscles are relaxed the concert hall will sound spacious and reverberant. You should feel like you are spitting the air a long distance. Then the only other action required is keeping the embouchure perfectly still by having a perfect seal against the mouthpiece. This way all physical action is accomplished from the chin up, which is the only way to get optimum resonance.
Your only responsibility once the air is instantly dispatched is to make sure the air is released in an even manner from the lungs naturally deflating without an ounce of pushing from the body.”
Place your index finger on your lips vertically as if to “sshhh” someone and quickly inhale a huge breath using the vowel “OH” to create a loud, low, ripping sound.
Inhale like this using the vowel “OH” when you play. Use the Inspiron to breath deeply and to mouthpiece buzz and keep the ball up while Set to 505 CC/Second flow rate. A steady relaxed airstream is critical to a full, beautiful tone. Ask students to blow through their instrument as they would to check for water in the slides or empty the water key. Remind students to blow the exact same way through the mouthpiece and horn when they play. When we ascend into the upper register we should blow faster and avoid tightening the abdominal muscles, which restricts the throat and causes a strained, brighter, sharper sound. There are many ways to improve breathing, blowing and tone. I recommend visiting windsongpress.com, reading books and articles about or by Arnold Jacobs, working with The Breathing Gym and breathing devices. Mouthpiece buzzing along with recordings on an Inspiron is a great way to improve your articulation, sound and ease.
EMBOUCHURE
An important key to efficient, easy brass technique is to learn to move the lips only inside the mouthpiece, not at the sides of the mouth or corners. Rim buzzing on a Cutaway Mouthpiece, Embouchure Visualizer, Mouthpiece Visualizer or valve slide pull ring, and practicing loud non-tongued SFFZ huffs, long tones, scales, arpeggios and flexibility lip slurs help develop the efficient, strong embouchure necessary for a beautiful sound in all registers. Mouthpiece buzzing on a cutaway mouthpiece rim/embouchure visualizer with recordings is another great way to improve your articulation, sound and preparation.
Mouthpiece Pressure and Developing a Fine Sound
The May 1992 Instrumentalist article “Concentrate on Sound” by Dale Clevenger states, On the subject of pressure, I am not a non-pressure player because I don’t believe non-pressure gets the sound. I have never had a student who did it successfully. They are basket cases if they try to play this way because they cannot produce a fine sound. More often I say to them [students] “Relax your face just a little. Put the mouthpiece up just a little bit firmer. Let the air come through slightly more relaxed lips, rather than tense lips.”
A Scientific Characterization of Trumpet Mouthpiece Forces by James Ford includes Arnold Jacobs’ statement, “Some mouthpiece force against the lips is important to ensure a proper seal around the vibrating portion of the lips. If too much force is applied, tissue can be damaged. When a player holds the mouthpiece on the lips too long, swelling develops.” At the website http://www.jayfriedman.net/articles/early_bird_gets_the_note, Jay Friedman, principal trombone of the Chicago Symphony Orchestra, states, “I want to stress the basic principal of producing sound: a critical balance between the 3 components of tone; enough firmness in the corners of the embouchure, enough air flow to vibrate the lips, and enough seal or stability of the mouthpiece against the embouchure, OK, pressure. When these 3 things are in the correct balance no other muscle activity is needed or desired. How much pressure is enough? Hold your arm out and focus on how still you can keep your hand. Hard huh? Now lean your outstretched hand against a wall with just enough pressure to keep it absolutely still. That’s the way you keep notes steady. Also, there are basically two kinds of mouthpiece pressure, which are useable in playing.
The first is when playing loud and high, bringing the mouthpiece closer to the face by a combination of the arm bringing the horn closer to the face and bringing the embouchure closer to the mouthpiece. Then there is another more subtle way to use pressure to stabilize the embouchure for holding long notes at a soft dynamic. That is by visualizing the horn as an unmovable object (like the wall) and leaning the embouchure against it to keep it completely still, therefore requiring only the monitoring of the air stream to hold a note perfectly steady. You should feel like you are spitting the air a long distance.
Then the only other action required is keeping the embouchure perfectly still by having a perfect seal against the mouthpiece. “Margaret Tung’s 2009 DMA document DALE CLEVENGER: PERFORMER AND TEACHER provides great insight and photos of CSO solo horn Dale Clevenger’s unique teaching aspects of Synchronization and Pursing.”
The following is Clevenger’s list of steps that occur when the production of sound begins:
-
- Press the mouthpiece in on relaxed lips. The function of pressing in the mouthpiece is merely to isolate the lips, the flexible flesh, inside the mouthpiece. The pressure should be enough on the lips so that the mouthpiece can be felt on the teeth. He advises that one can either breathe and then press in, or press in and then breathe, adding, however, “more and more I am pressing first, and then breathing because often when you breathe, you firm your lips.” For these reasons, it is recommended that before any other actions take place, players isolate relaxed lips with the mouthpiece by pressing in the mouthpiece for optimal sound. This isolation of the flesh inside the mouthpiece allows the air to move freely.
- Breathe in. While breathing, it is crucial to keep the lips relaxed both inside and outside the mouthpiece in order to avoid tension while playing. Clevenger’s students can confirm how often he has said, “Do not stretch your lips when you breathe!” If the lips are stretched or tense while breathing, the probability of their returning to a relaxed state to produce sound in such a short period of time is not likely.
- Strengthen the lips around the mouthpiece, particularly the corners, in order to counter balance the pressure of the mouthpiece from step 1. With the relaxed isolated lip inside the mouthpiece, the embouchure is ready to form its foundation around the mouthpiece. Clevenger explained the process in more detail: I never talk about too much pressure; somebody may play with too much pressure, but they are usually not counter balancing and playing with enough facial isometrics or facial muscles. You can use too much of either, or too little of either, and not get the desired results. So we are constantly going through a process called trial and error with beautiful tone as the primary criteria. For therapy, start a note in the middle range without tongue or articulation by blowing air through the mouthpiece and horn and letting the embouchure form until sound is attained. The goal is to “use your muscles until you get a sound.” Clevenger stresses that the “primary criteria for doing this right is the sound. If there is not enough or too much pressure, it won’t sound right.”
Mouthpiece Pressure Exercise
The following exercise can also be used to help students understand the importance of forward, contracted and firm mouth corners. Place the mouthpiece on relaxed lips with no embouchure setting, press in gently adding moderate mouthpiece pressure (about 3% more than no pressure), just enough to feel it on your teeth, like you would if you touched your finger to your lip. As you blow air, press the mouthpiece in gently on RELAXED lips and strengthen the lips around the mouthpiece, particularly in the corners, in order to counterbalance the pressure of the mouthpiece. Blowing air through relaxed lips, press in gently and firm the mouth corners, slightly contracting the mouth corners inward, to counterbalance the mouthpiece pressure. As you blow air, press in gently on RELAXED lips using only enough corner contraction to begin the “buzz” and avoid leaking corners or puffing the cheeks.
VOWEL
Another important element of a good tone is the proper use of vowel. The legendary brass teacher Arnold Jacobs observed that we first learn to use the tongue through language and diction, using consonants and vowels. We can only communicate with the tongue muscle and find efficiency, ease and beautiful articulation via listening and the use of vowels. Say the vowel “tOH” and “tAAWH” and breathe in and out using those vowels. These vowels open the throat, lower the tongue and jaw and will help produce a warm, lovely tone with a centered pitch. Say “tAH” and “tEE” and breathe in and out using those vowels. These vowels raise the tongue and jaw, make the oral cavity smaller, push the tongue forward and cause us to sound bright and sharp. The primary difference between the vowels tEE, tAH, tOO and tAAWH is the back of the tongue, which controls the oral cavity, pitch and tone. Remember, a lovely, warm tone is always our first and foremost goal. Using vowels to communicate with the tongue, say a repeated series of “tOOH-tOOH-tOOH” and for low register say “tAAWH-tAAWH-tAAWH.” Listen to recordings of artists playing all articulations and concentrate on imagining and mentally hearing a beautiful sound, clarity and response while you play. Your body will figure out how to make a beautiful, clear, articulated sound if you imagine it correctly and experiment a bit with where the tip of the tongue touches when you articulate.
Tongue at the Bottom of the Top Teeth
Dale Clevenger, recently retired solo horn of the Chicago Symphony Orchestra teaches, “the cleanest and clearest articulation is produced when the tongue meets the [back of the] bottom of the upper teeth.” Say “thOO, thOO, thOO,” and for low register, “thAAWH. thAAWH, thAAWH.” This helps enlarge the oral cavity and lower the tip of the tongue to touch the back of the bottom of the upper teeth. Position the tip of the tongue behind the bottom of the top teeth to articulate. These vowels open the throat, enlarge the oral cavity, lower the tongue and jaw and will help produce a warm, big, lovely tone with a centered pitch. Many low brass players tongue at the bottom of the top teeth and it is common pedagogy. Many high brass students tongue and are often taught to articulate at the gum-line where it meets the back of the upper teeth. A little experimentation using “thOO” to lower the tongue and open the oral cavity will prove that tonguing at the back of the bottom of the upper teeth produces the cleanest, clearest response and articulation, especially on low and soft notes. It also warms and darkens the sound and lowers the pitch to the correct pitch and tone center instead of generally running a bit sharp and bright.
Play repeated notes with Spotify “Cello Drones” or a Tuner Drone Pitch. Tongue where you normally articulate while listening to a drone pitch and then compare that sound, response and pitch to tonguing with the “thOO” vowel, behind the bottom of the upper teeth. Make certain the tip of the tongue touches behind the bottom of the top teeth, not between the teeth. Tonguing between the teeth will block the air and generally produces slow tonguing and poor, late response, especially in soft passages. If you or a student tends to tongue between the teeth, curl the tip of the tongue upward like the front of a snow ski and this will help avoid this common articulation flaw. Avoid using “Twah” which moves the entire tongue and lower jaw.
This causes “chewing” and unmusical swells and pitch variance on each note. Don’t stop notes with your tongue as in “TuT.” If the beginning of the note is fuzzy or unclear, most likely the tongue is making contact too high on the back of the upper teeth or even on the roof of the mouth, which may interfere with the flow of air. Clarity and easy response is important for all brass musicians, but even more so for horn players because the horn bell points away from the audience and the hand is in the bell, creating obstacles for articulation clarity. All brass players should strive for the sound to be beautiful, clear, clean and articulated for the last row. Conductors rarely comment that a passage is too clean, clear and on time.
Always blow fast enough to produce a good ringing sound, even on very short notes. The use of UU, OO, dOO, thOOH, tOH, thAAWH and tAAWH vowels pull the tongue down and back to enlarge the oral cavity and encourage contracted mouth corners, which reduce corner motion and are vital to good tone and technique. Minimum corner motion is important to developing a consistently beautiful tone, easy technique and good intonation in all registers. Playing with the vowels TAH, and TEE are common mistakes, which produce poor response, a bright tone and sharpness. To find the best sound, students should mouthpiece buzz and play a long middle register pitch with a drone pitch and experiment with different vowels, while raising and lowering the jaw. Repeat mouthpiece buzzing and playing a long low register pitch and experiment with different vowels, while raising and lowering the jaw. “EE” restricts the airflow and relaxes the corners causing poor response and weak buzzing. OH and OO vowels improve response and buzz. We should use the vowel thAAWH in the low register, from middle c downward, to slow the air, open the jaw and enlarge the oral cavity. Pitch bending exercises and thAAWH can help open up a nasal, pinched sounding low register.
Practice Mute
Using a Practice Mute can help improve projection and response. Practice mutes, designed for apartment and hotel use reduce decibels and increase resistance. Practice mutes encourage us to inhale more air and blow faster, developing both tone and dynamic range. Playing along with loud recordings on a muted instrument helps to develop a great sound.
Long Tones
Great players practice long tones, from ppp to fff each day. We should begin with phooh, without the tongue; make an immediate crescendo to as loud as possible and a slower decrescendo to as soft as possible. During crescendos we should relax the aperture to allow more and thicker air and contract the aperture slightly inward to produce a smaller diameter faster airstream for diminuendos. We should strive for steady, consistent pitch and a beautiful sound at all times. It may help to watch a tuner.
Dynamics
At http://www.jayfriedman.net/articles/long_tones, Jay Friedman principal trombone of the Chicago Symphony Orchestra, states, “Everyone can move air fast when playing the louder dynamics, (although most people even then don’t move it fast enough) but as soon as the dynamic is reduced the air will automatically slow down, causing the sound to change, lose focus and projection. The way to think about the sound in the softer dynamics is to imagine a forte dynamic that has been moved a distance away. In other words it is the same sound, same clarity, same intensity and focus, just farther away.
The only way to achieve this is to not slow down the air stream when playing soft. Less air will be used at the softer dynamics but it must move at the same speed to get the same sound as in the louder dynamics. This can be done by narrowing the aperture of the embouchure so that the air stream is concentrated into a smaller area causing it to move faster.”
For Horn Players Only, Right Hand Position
The position of the right hand in the bell is very important to a good horn tone and intonation. There is much variety in the right hand positions use by professional hornists and we may use slightly different right hand positions for different musical effects. However, there is general universal agreement concerning the following ideas. Insert the right hand, in a vertical position, similar to a handshake, into the bell. Keep the thumb and fingers close together without any spaces and touch the back of the hand/fingers to the inside of the bell at 3 on the face of a clock. Keep the hand and wrist straight and so that the tone flows past the palm, not into it and is not muffled by excess cupping of the palm. Remember to keep your right hand inserted straight, but deeply into the bell. Think Princess Waive, then vertical like a handshake and insert until knuckles prevent further insertion.
Read the chapter on Playing Position and Use of the Right Hand in The Art of French Horn Playing by Philip Farkas and The Dale Clevenger French Horn Method. We can even use the right hand with different positions in the bell to change the sound like an artist uses different brush strokes. One of the most common horn playing errors is playing with the right hand too far out of the bell and the hand too cupped. Playing with the right hand too far out of the bell causes a sharper, brighter sound and doesn’t provide a good response and “slot” for upper register. Playing with the right hand too cupped makes the pitch flat especially on the B flat side of a double horn in the upper register. Playing with the right hand too far out of the bell and the hand too cupped combines two problems, a sharper, brighter sound that doesn’t provide a good response and “slot” for upper register and flatness especially on the B flat side of a double horn in the upper register.
Equipment
Choice of instrument and mouthpiece can influence sound. A change of mouthpiece often changes the tone more than a change of instrument. We should purchase the best quality, free blowing, warm sounding equipment that we can afford, but remember it’s the player not the instrument that produces the sound.
Listening and Imagination
Remember daily listening to mp3s of great artists and live concerts by the best soloists, orchestras and military bands help us develop a concept and memory of a lovely tone. Mental imagined tone concept, desire for a lovely tone and daily fundamentals are the most important keys to developing a beautiful sound.
To learn more about Joe Neisler and the Illinois State Horn Studio, visit http://www.conn-selmer.com/en-us/artist-information/centerstage/artist-roster/joe-neisler/, Subscribe to the Illinois State Horns YouTube Channel, Like the Illinois State University Horn Studio Facebook Page and visit the Illinois State University Horn Studio website.